Installation
Prerequisites
Before you begin the installation process, ensure you have the following:
- An active Azure subscription
- Permissions to create resources in the subscription
Steps to Install Entelexos from Azure Marketplace
-
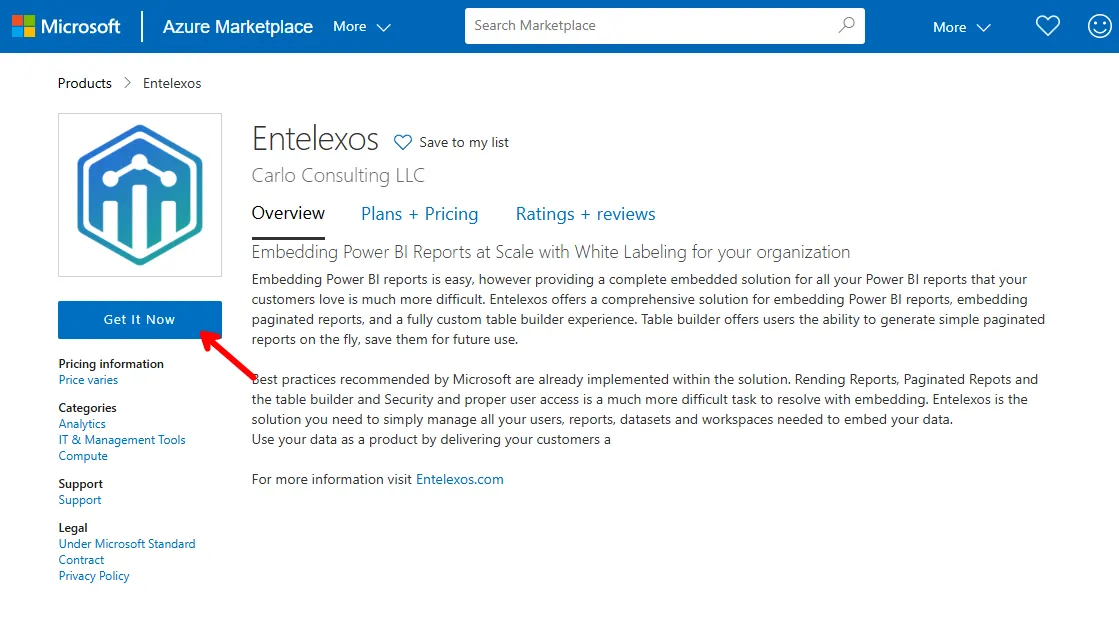
Navigate to Azure Marketplace
- Go to the Entelexos Product on Azure Marketplace.
-
Click on Get It Now
- On the product page, click the Get It Now button to start the installation process.
-
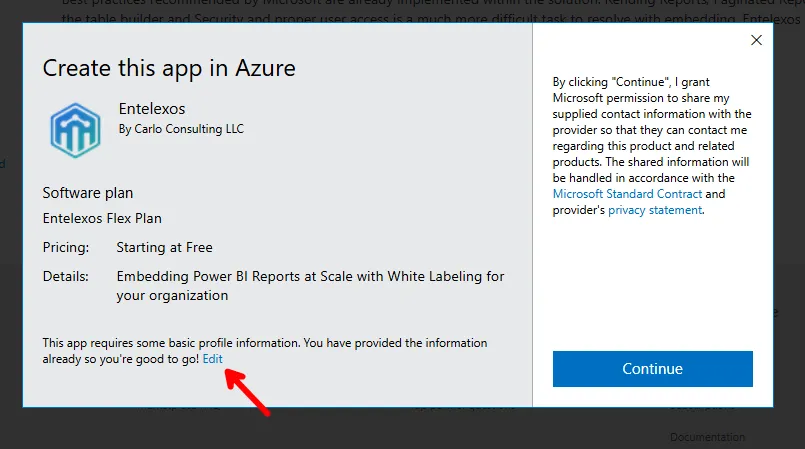
Click on the Continue to proceed with the installation.
- Basic Profile information is required.
- To edit the basic profile information click on the Edit button.
-
Sign into Azure
- If you are not already signed in, you will be prompted to sign in to your Azure account.
-
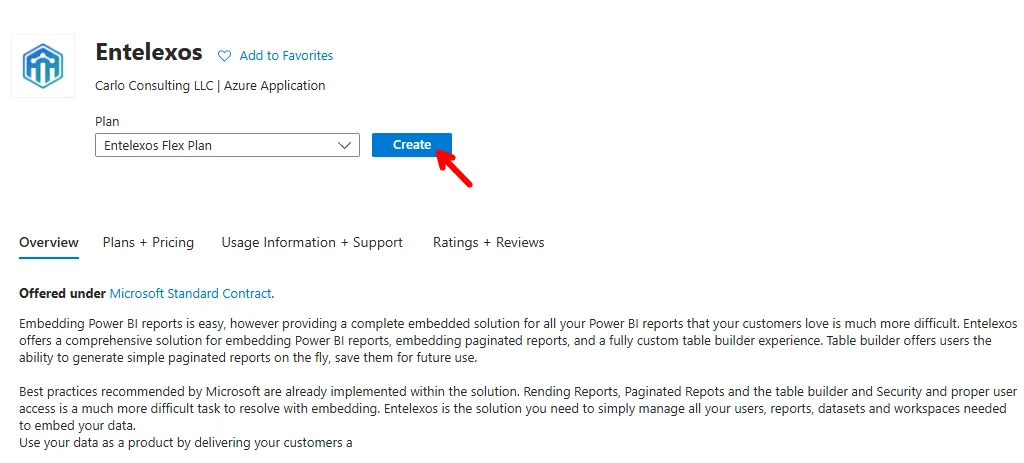
Select the Entelexos Flex Plan
- After selecting the Entelexos Flex Plan, Click on the Create button.
Note: Entelexos Flex Plan is a flexible plan that allows you to upgrade from Basic to Standard at any time. Basic and Standard plans are installed with a 30 day free trial. So no payments is required for the first 30 days of running the application. After the 30 day trial period, you will be charged based on the plan you selected.
-
Configure the Installation
- Fill out the Project Details:
- Subscription: Select the Azure subscription where you want to install Entelexos.
- Resource Group: Choose an existing resource group or create a new one.
- Region: Select the Azure region where you want to deploy the application.
- License Administrator Email: Enter the email address of the license administrator. This is the person who will manage the application and its settings. This will need to be a valid user email address and must be the first person to log into the application to complete setup.
- Subscription Type: Choose the subscription type for the Entelexos application. You can select either Basic or Standard.
- Application Name: Enter a unique name for your Entelexos application. This name will be used to identify the web application installed into your Azure resource group.
- Managed Resource Group: Name of the resource group that will contain the managed resources for the Entelexos application.
- Fill out the Project Details:
-
Click on Review and Create
- Review the configuration settings and click Review + Create to initiate the installation.
-
Click on Create
- After reviewing the settings on the Review + Create page, click the Create button to start the deployment process.
-
Open the Entelexos Application
- Once the deployment is complete, you will see a notification indicating that the deployment was successful.
- Click on the Go to resource button to open the Entelexos application.
- Once in the resource group, you can find the Entelexos application listed as a Managed application.
- Click on the managed application to open the Entelexos application.
- Go to Settings find the section called Parameters and Outputs find the item labeled appURL. This is the URL you will use to access the Entelexos application.
Note: to configure the custom domain on the Standard plan, you will configure this within the Entelexos website.